- Intro
- Street kit
- Street kit recommended alignment specs
- Pro kit
- How to use Wisefab Double Adjuster
- Pro kit recommended alignment specs
Wisefab urges you to have fun with this product and if you have any issues be sure to e-mail us at quality@wisefab.com. Help us make this experience better for you.
Intro
This post is about Wisefab Corvette C5 and C6 angle kits. We have combined Street and Pro kit installation guidelines into one post. First we will take a look how to install the Corvette Street kit. Which is essentally a Pro kit with out Wisefab Control arms. You can always update your Street setup with our Control arm kit. Be sure to check out the Corvette halfshaft kit as well. Rated at 1500hp.
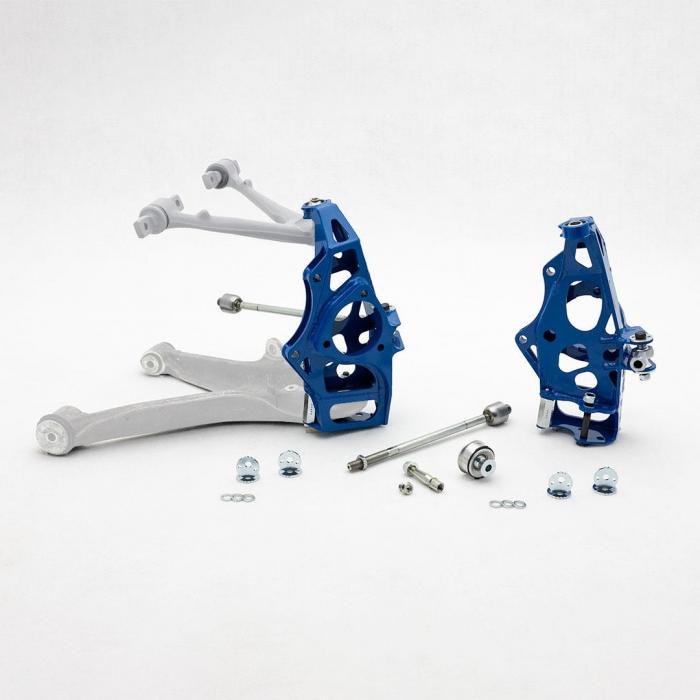
Street kit
Welcome Corvette C5 and C6 Wisefab angle street kit for OEM Arms. The Street kit. Here is a view of assembled components in the right corner. OEM Tie rod will not fit. You will need Corvette C4 Tie rod with the part number 21011026 for this angle kit. We have included hardware for the OEM arms. Lower control arm bushings and upper control arm cone shaft with hardware. These parts will connects Wisefab Corvette knuckle with OEM control arms.
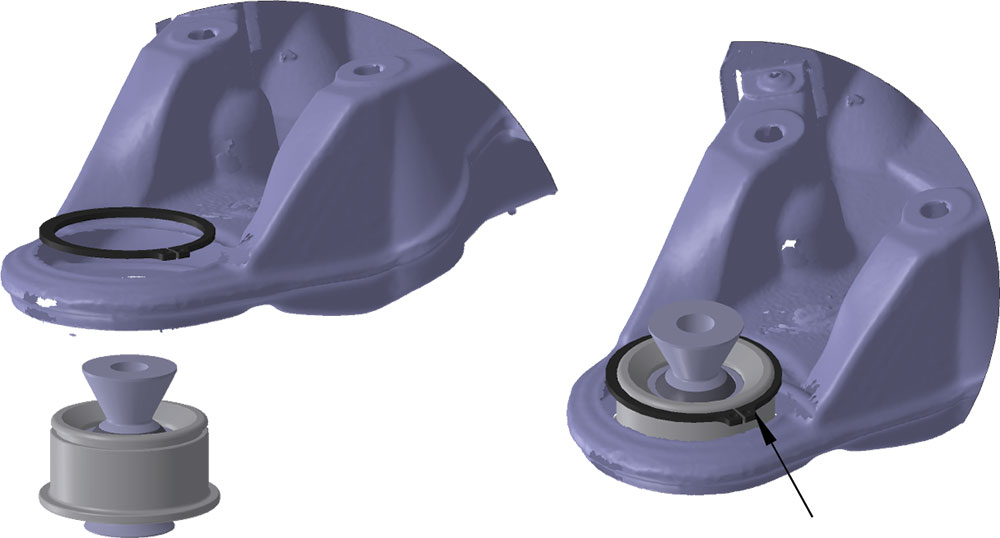
Installing the Lower Arm Mounting
Remove OEM ball joint and install the Wisefab Lower arm bushing using a hydraulic press. Press this bushing from the bottom of the knuckle. Install the C-clip rings from the top.
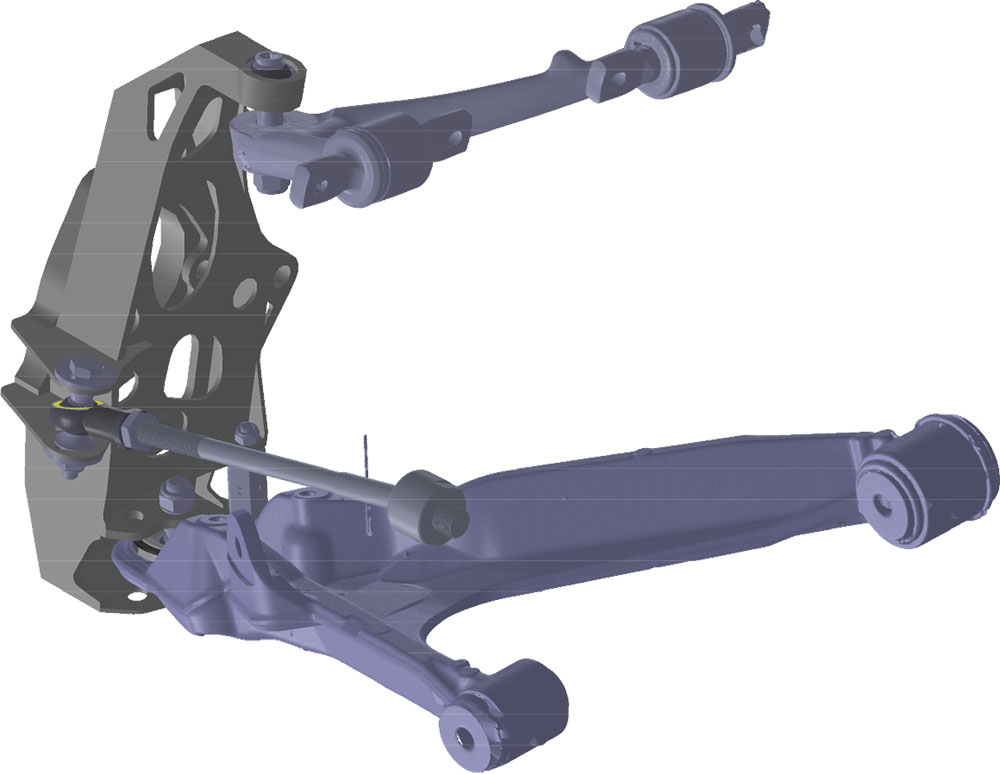
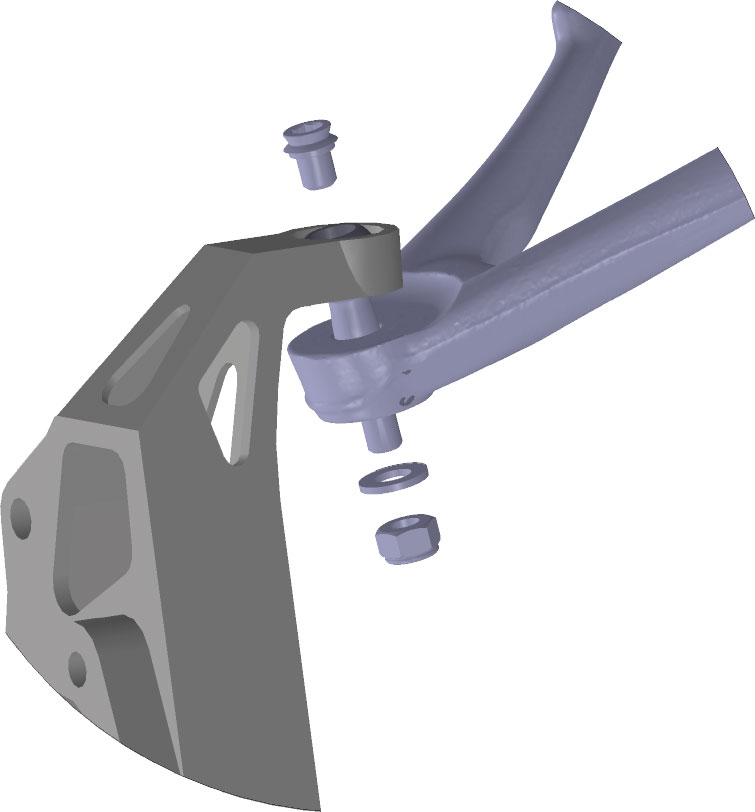
Installing the Knuckle
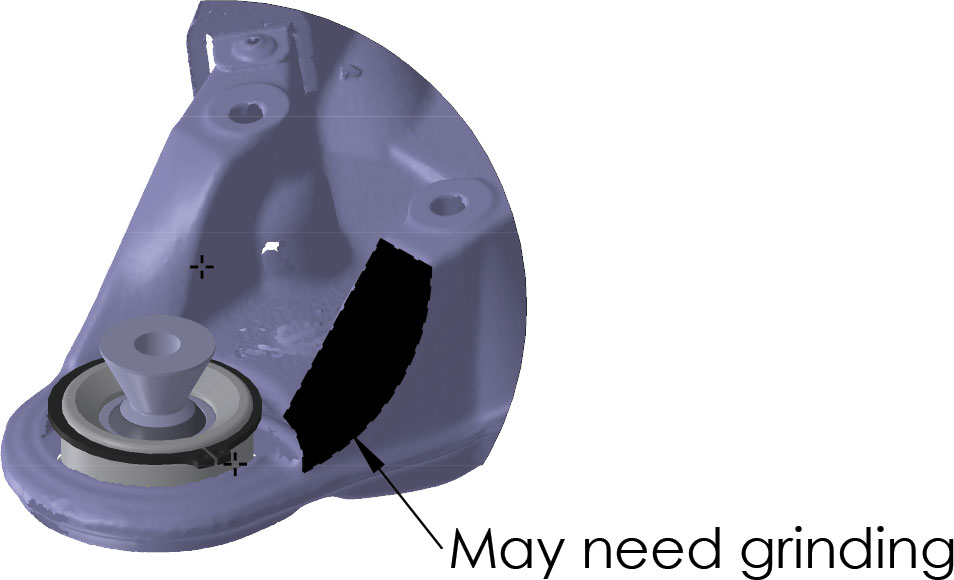
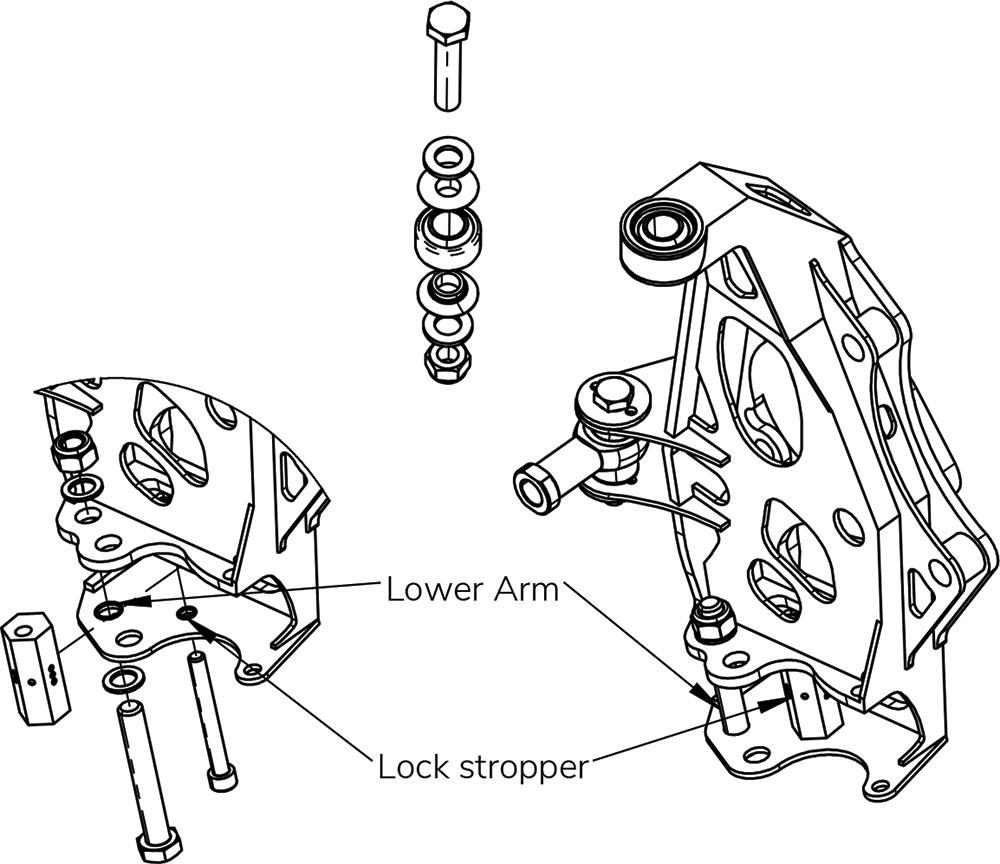
Wisefab knuckle has two setups for lower control arm mounting. For the Street setup OEM LCA use the inner mounting point. Use the cone bolt and hardware to install the upper control arm with the knuckle. Check for clearance. There is a section on the lower control arm that you need to grind. Check the picture. Wisefab lock kits include adjustable hexagonal lock stoppers. Where each side has a different offset. The more dimples, the more offset and by that less usable lock.
Installing the Tie rod
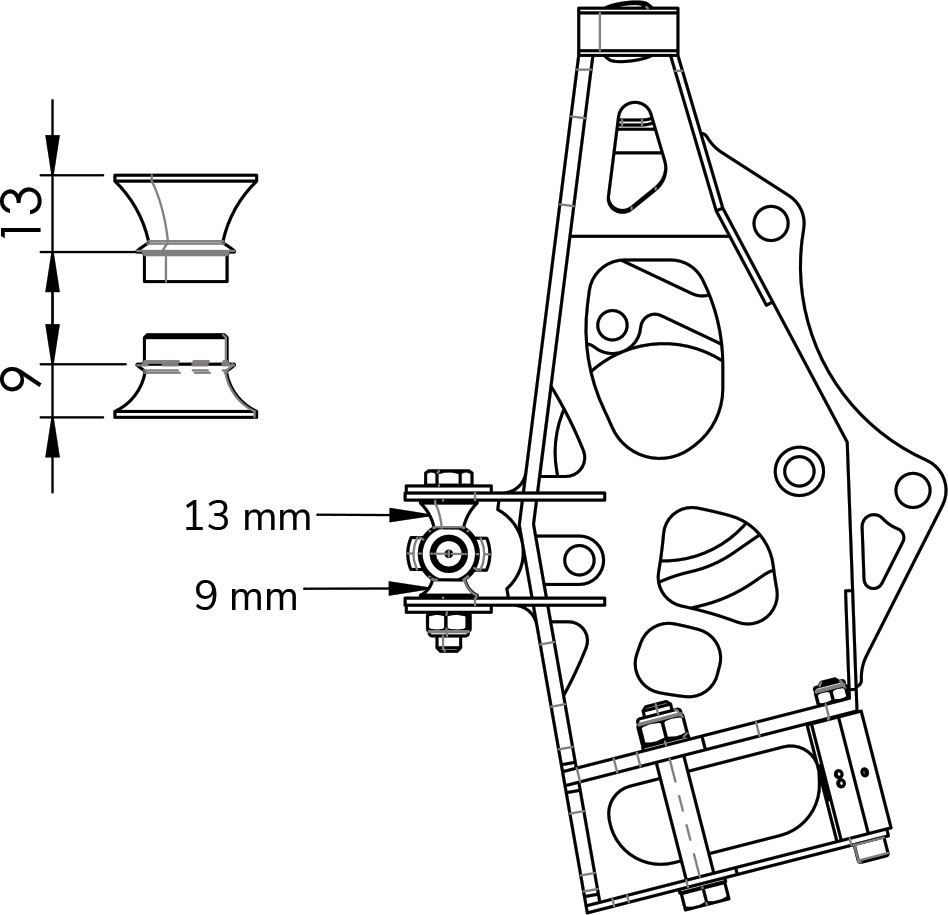
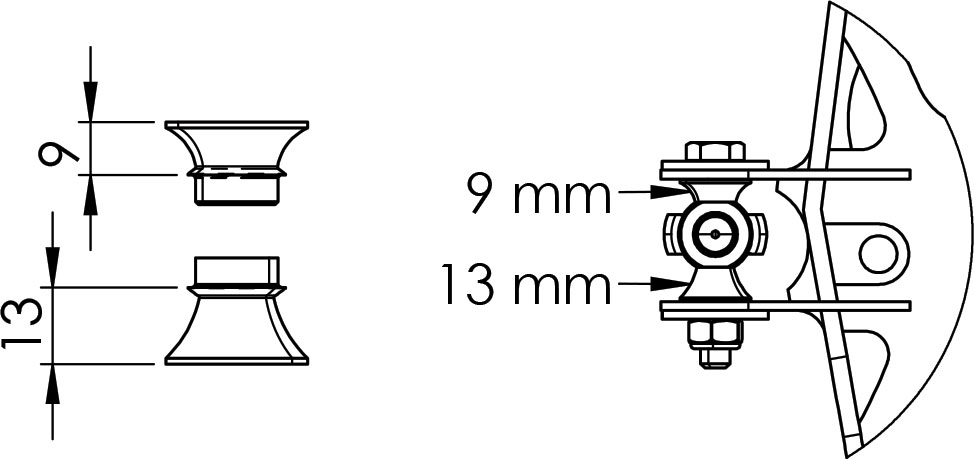
The rod end with spacers has different height spacers. For the Street setup upper spacer must be 13 mm high and lower spacer 9 mm.
Street kit recommended alignment specs
- Camber: -4.8°
- Caster: 7°
- Toe: if ackerman is O or negative then toe is 2mm
- If ackerman is positive then toe is 0
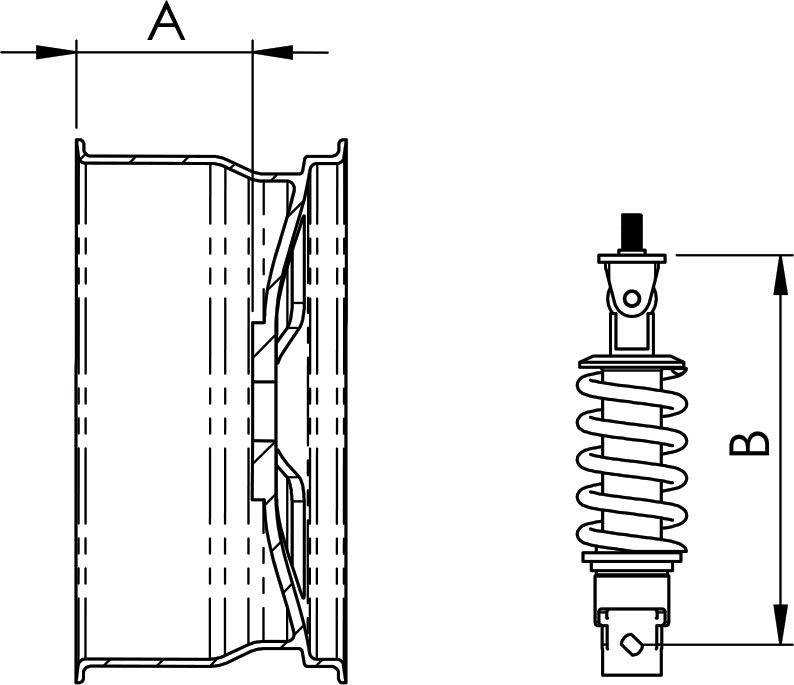
- Wheel Backspacing (A) max: " 17" wheel - 160 mm
- 18" wheel - 160 mm
- 19" wheel - 160 mm
- Some 17" wheels may not fit
- Coilover: length (B): Rideheight 350 mm
- Maximum: 430 mm
- Minimum 315 mm
Pro kit
Introducing the Wisefab Corvette C5 and C6 Chassis suspension kit. Here is a view of assembled components in the right corner. We want to give you out of the box performance. For that all lengths of the control arms are preset by Wisefab assembly team(exc. tie rod). Bolts and nuts may needed to loosen to make your assembling easier.

Installing the Lower Arms
Our lower control arm installation is quite straight forward. Insert the arm into factory lower control arm mounting slots. Tighten with bolts. We recommend using new bolts and nuts. Wisefab has built in a double adjuster on the lower control. For a convenient on race track camber and caster tuning. Lower arm has a built in camber/caster tuning with Double Adjusters. When you want to adjust camber you will need to tune both adjusters the same way. Caster is set by tuning adjusters the opposite way. Wisefab has included Anti rollbar mounting with the lower control arm. OEM anti-roll bar may need some modifications to fit. You should uninstall anti-lock bar when you want extreme steering angles.
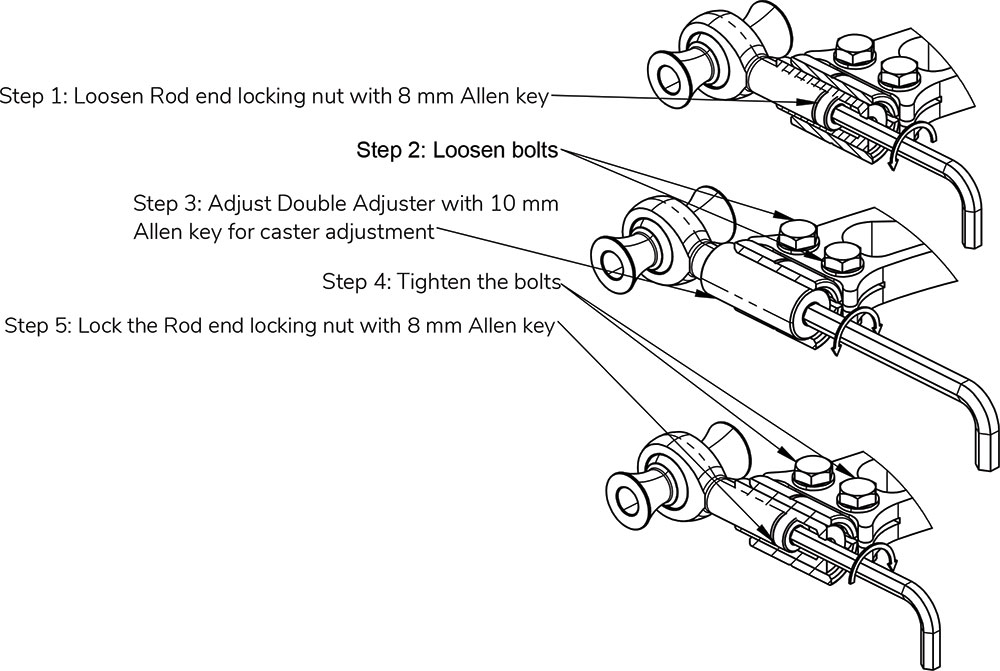
How to use Wisefab Double Adjuster
- Step 1 is to loosen the locknut using a 8mm Allen key. Locknut is inside Double adjuster unit. Is accessed through the Double Adjuster 10mm Allen hole.
- Step 2: Loosen bolts two bolts on the Corvette lower control arm.
- Step 3: Tune Wisefab Double Adjuster with 10mm Allen key
- Step 4: Tighten the 2 bolts on the LCA
- Step 5: Tighten locknut inside the Wisefab Double Adjuster with 8 mm Allen key
Installing the Upper Arm
Our upper control arms are not symmetrical for the Corvette chassis. Make sure that shorter link is facing forward when installing it. Check out the picture how the body mountings position must be. Shorter end must be inside of the upper control arm. Tighten rod end locknuts after installing the upper control arm. Wisefab has included some spacers with the upper control arm. Those will come handy on the next step.
Installing the Knuckle
Use a M12 bolt and nut when installing those upper control arm spacers. Press those spacers into knuckle upper spherical bearing. Tightening the M12 bolt. Make sure that all the surfaces are parallel while tightening. Install the knuckle to the upper control arm. There are two setups for the lower control arm. Where the inside mounting point is for the OEM Corvette C5, C6 lower control arm. The second mounting point is for Wisefab lower control arm. Same applies with the adjustable lock stopper. Wisefab lock kits includes hexagonal lock stoppers. Where each side has a different offset. The more dimples, the more offset and by that less usable lock. Connect hub with OEM bolts, but use 3x M12 washers which came with knuckles. Add rotors and calipers.
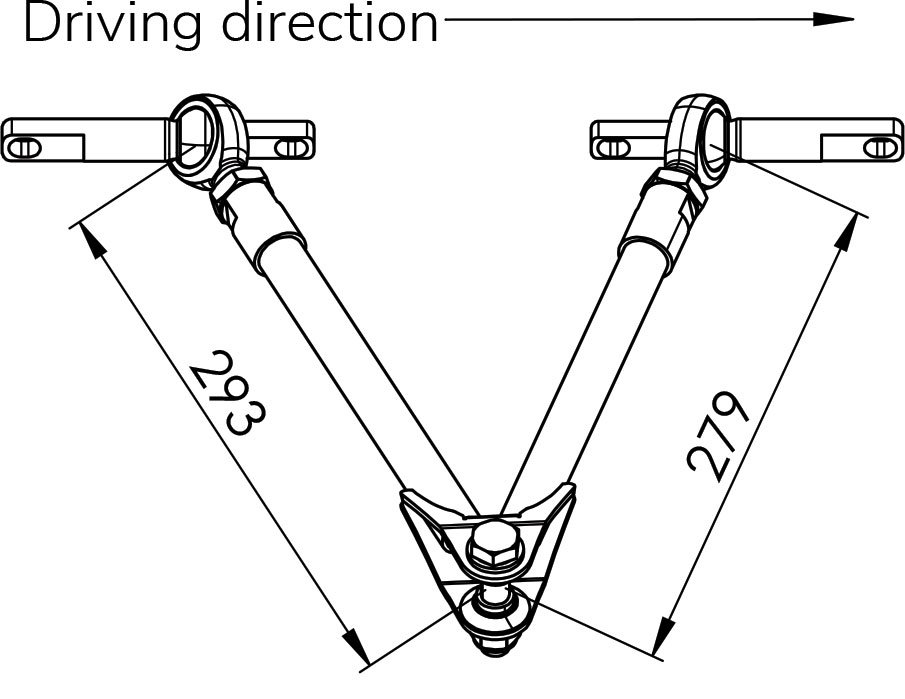
Installing the Tie rod
Wisefab Corvette kit tie rods have non symmetrical spacers where one is 9mm high and the other one is 13mm high. Upper spacer must be 9 mm high and lower spacer 13 mm.This affects the bump steer of the car. For a parallel steering setup on a Corvette C5 you can use the Zero Ackermann washer. But on the C6 chassis you’ll need to use the 3mm Ackermann washer for parallel steering setup. Offset towards the the wheel. If you are using the Wisefab Rack offset kit setup on the C6 then use Zero Ackermann washer.
Recommended Alignment Specs
- Camber: -3.5°
- Caster: 6°
- Toe: if Ackermann is 0 or negative then toe is 2mm
- If Ackermann is positive then toe is 0
- Wheel Backspacing (A} max: " 17" wheel - 145 mm
- 18" wheel - 147 mm
- 19" wheel - 150 mm
- Some 17" wheels may not fit
- Coilover: length (B): Ride height 378 mm
- Maximum: 430 mm
- Minimum 345 mm
IMPORTANT!
Be sure to check the clearance in all extent of the suspension travel when istalling Wisefab suspension kits. Remove the coil springs for that. If there is clearance issues then change your wheel alignment or limit the suspension travel.